Let’s say you’ve decided to create a website. You want to do it for your own business or out of curiosity; it doesn’t matter. Then, you instantly face a question of what exactly needs to be done and in what order.
In case you already have a functioning online resource (even if it doesn’t meet all of your requirements), you’re lucky because it gives you invaluable experience that can be analyzed, evaluated, and used as a base for further work. You can examine the advantages and disadvantages of the old web page and define the wishes for the new one. But if you create the website for the first time, you may have difficulties with formulating the to-do list. That is why we decided to create this simple action plan, which will help you get the best result with minimum time and effort.
1. Create a vision
Ask yourself a simple question – what do I want to get? Quite often, the answer is “I want an ordinary website.” In this case, you’ll get “an ordinary” result, which will not fully reach the target audience and, thus, will not make you sufficient profit. However, what you should get is the product that can be assessed in terms of goals achieving as well as money and time spending. Therefore, the primary step in your plan should be building a vision of your future online resource.
The first thing that you should do is to write down all your thoughts on paper. Yes, this advice may sound very primitive, but in reality, lots of people start building their websites without thinking about the problem they want to solve. The whole point of creating an online resource is about providing a positive user experience and solving problems. It cannot be done without a clear understanding of the target group’s needs and desires. Think about the content, layout, and functionality that can be interesting and useful for your visitors and put these ideas on paper.
To get a better view of what your web pages should look like, you need to answer these three questions:
<ul
- WHY? (What is the purpose of your website?)
- FOR WHOM? (What is your target audience?)
- WHAT? (What type of online resource will you design?)
Why?
Ask yourself a question: why do I need a website? Do you find it extremely important that your friends and colleagues admire the creativity and design of your web page? Maybe, you plan to drive the main competitor out of the Internet market by providing visitors with a more convenient online service. Or do you want to use the website to work with potential clients in other countries and create a sort of virtual office to serve their needs and take orders from around the globe?
Define one main goal that should be achieved with the help of your online resource and do not be under the illusion that it will solve all the problems you have. For instance, if you plan to design a webpage full of spectacular graphics about your brand, then it can hardly be a successful online hardware store or powerful news resource.
Keep in mind that the goals of your website should be measurable. They have to be assessed by the specific number of visitors, precise actions of these visitors on the site, and the money you should get.
For Whom?
The next step is to identify the potential visitors of your website – target audience or target group. It is the category of people who may be interested in the content or goods and services offered on your online resource.
The portrait of the target audience or a customer portrait is a fictional person who belongs to this group. It’s easy to build such a portrait by answering the following questions:
- Who is the potential visitor? Take into account such aspects as age, social status, place of work, hobbies, topics of interest, etc.
- Where does the user spend time online? What forums, Internet platforms, and web pages does he/she visit?
- How can your online resource help the visitor? It is important to think about the client’s problems and the solutions you can offer.
- What will the user get? For example, new knowledge, the ability to become healthier, smarter, and more productive, etc.
- Why should one visit your particular web page and not the other one? Specify what unique advantages and benefits your online resource has to offer.
In terms of website creation, the target audience is usually divided into two main groups:
- Visitors interested in content (they come to read about products)
- People interested in buying (their goal is to order a particular good or service)
The common mistake that lots of business owners make is aiming at a broad target audience. They believe that everyone needs their products and waste marketing budget on the users who cannot be transformed into customers. Luckily, some professional marketers can define a customer portrait for you. Otherwise, you may use modern online resources and perfectly analyze the target group by yourself. It will take you just one day of thorough work.
What?
Determining the right type of website is extremely important for its development. Otherwise, after getting a completed web resource, you may see that it performs completely different tasks and functions than you need. Here are the 10 most commonly used types of online resources:
- Business/Corporate Websites
- E-Commerce Websites
- Portfolio Website
- NGO /Non-Profit Websites
- Blogs
- Social Media Websites
- Educational Websites
- Entertainment Website
- Web Portals
- Forums
Let’s have a closer view of the three types that are most often ordered for businesses – portfolio, business, and e-commerce websites.
Corporate Websites
A business site is a commercial site of a company. It’s the optimal solution for all businesses that want to become leaders in their industry. The main task of the corporate web page is to promote the company’s brand name and automatize its activities. That’s why it combines the elements of an online store, portfolio, and information resource. A well-designed corporate website can help a business significantly increase its brand liability and benefits Internet promotion.
It usually has a complex navigation system. In addition to catalogs and other means of presenting company products, it can contain sections with brand news, articles, vacancies, and portfolios. The corporate website also helps to automatize the company activities, maintain an accounting database, and provide online customer service. It often has a search system, live chat for clients, and the “Contact Us” page.
E-commerce Websites
Business websites are usually chosen by representatives of middle and small businesses. This type of site is capable of performing all the necessary tasks that meet the needs of the company, and it is affordable at the same time. Within the framework of the basic web page, a company can provide Internet users with information about itself and the goods/services offered, as well as show pictures of previous work and share news in its field of activity.
The main function of an e-commerce website is to sell goods and services online. That is why it has to contain a catalog with illustrations, prices, and detailed product or service descriptions, as well as an online ordering system and integrated payment gateway. This type of online resource usually has a shopping cart function to stimulate visitors to make several purchases at once and a calculator function to show the cost of the entire order.
E-commerce sites are usually intelligently designed and easy to navigate. They are used not only for selling goods and providing services online but as an addition to the existing offline stores.
Portfolio
This type of website contains basic information about the company, its contacts, activities, and products. The purpose of the site is to represent the brand online. It gives essential facts about the brand and a wide range of photos and videos of the offered goods and services. As a rule, such a web resource has a simple navigation system, which consists of only several pages. The main sections are “About the company”, “Products and services”, and “Contact information”. Another important feature of this site is a unique but functional design.
Portfolio websites are ideal for small businesses that want to promote themselves and their services on the Internet. They are also perfect for enterprises, nonprofit organizations, and individuals who want to establish a personal brand.
2. Analyze Suitable Samples
When you have chosen the topic, type, and purpose of your site, it’s time to carefully study similar resources ranked in the Google top list. Each of them was able to get to the top of the search results, which is why you should study their positive features and implement them in your design.
Pay attention to the position of the text, website structure, and other interesting design points like animation, color combination, and logo placement. After analyzing a couple of sites, you will surely see common features and patterns. Just do not make your web page the same from header to footer – it is plagiarism. Use their ideas only for inspiration.
Even if there are no good samples in your niche for some reason, do not skip this step. Try to explore the web resources from a related niche, make a mind map, and draw sketches of the future interface. It can be used as a base for your future work.
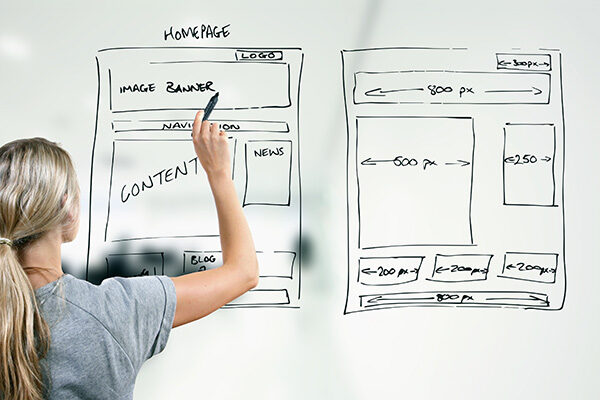
3. Sketch the Basic Structure of Your Website
When you have a clear vision of your website, you can start working on its configuration. Sketch the site structure – a graphical representation of the future web resource, which includes all pages arranged according to the chosen hierarchy. Generally speaking, site structure is a layout that consists of a user interface that surrounds the main content of the site and helps you navigate and use all its features.
Plan ahead which elements will play the key role and how they will be connected. You can do it in your head, on paper, or using special services. Building a site structure will help you determine the number of pages to draw. You will also get a detailed understanding of the project as a whole.
4. Divide the Website Layout into Subsections
Each section of your site should tell a story that has meaning and purpose. Every page on the resource needs to present the content by highlighting the most important elements in this story. Ideally, there should be just a few crucial items on each page and nothing redundant. To get such a result, you have to constantly ask yourself a question: “What else can I delete here?” Don’t be afraid to get rid of unnecessary elements. Remember that the key to easy usability is simplicity.
Imagine the most minimalistic web resource and keep implementing this idea. You will be surprised at how difficult it is to keep things simple.
5. Choose the Software
When you have developed a vision of a website’s look, it’s time to think about how to do it in practice. The first thing you need is software.
A few years ago, Photoshop was almost the only tool that designers used to create layouts. Luckily, modern designers have a much wider choice:
- Readymag
It’s an inexpensive and convenient online tool for creating simple website designs. The online constructor allows you to create a website directly in the browser; so, you can immediately see how the pages will look after launching.
- Tilda
These days, it’s, perhaps, the most popular website builder. It comes in handy if you need to create an online resource larger than a landing page but cannot hire a layout designer and a programmer for this purpose.
- Adobe Illustrator
It is one of the most famous programs intended for creating vector images. It’s usually used by professional designers rather than beginners.
- Photoshop
If you have decided to get into design, it’s the basic software you have to be able to work with. Yes, there are already many analogs for creating layouts, but none of them provides such abilities to adjust the image as Photoshop.
- Sketch
Since the program is still available only for iOS, it’s suitable only for designers who use Apple products.
- Figma
It’s a relatively new but already popular product. Its key advantages are accessibility (it works both in a browser and on any platform), convenient structure, and an intuitive interface.
6. Select a Font
Learning about different fonts and colors is a part of the initial project work. There are many free fonts available for downloading and immediate use, but it can take a long to find the right combination for your particular project. In response to this request, free services have been created. They can quickly and efficiently help you find the perfect match.
We advise you to use no more than two fonts in one project, but everything, of course, depends on the requirements that you face. For the main content, choose a font that is easy to read even for a very long time; you can make the headlines more playful. Don’t be afraid to use big fonts; be bright and original.
Choose a Color Scheme
When working on fonts, you should also think about colors that are best for the interface. You’ll need at least three shades for:
- the text itself
- background,
- accents
We recommend using a small selection of contrasting colors and tones. Think of sites like Facebook and Twitter their color scheme is very simple and monotonous. As for illustrations and details, you can choose any color, but make sure it goes well with other shades.
Here is the tip you can use to pick a color scheme quickly and easily: choose any picture with the colors you like and upload it to a special service like Color Palette Generator or Palettegenerator.com. The service will analyze the image and give you a finished color palette.
And don’t forget that the shades you choose need to correspond to your target group. For example, kids and young people under 25 like bright shades, and the representatives of the older generation prefer darker tones. Women love warm colors (red, purple, and yellow), while men are fond of cold shades (blue and dark-green).
8. Create a Prototype
The real work begins when you start drawing a site layout in the illustrator. Even if you are making a web page for yourself and will not show it to anyone, the first thing you should do is to create a website prototype. This process implies the positioning of the key blocks like header, slider, buttons, contacts, and material structure. Having a prototype allows significantly saving time for the next stages because you will be able to see the approximate result and make changes painlessly.
9. Rethink Components
Designers dictate how visitors search the web page. It’s a part of your job to decide how many steps a user must take to complete a certain task (make an order, send a request, sign up for a newsletter). Of course, in most cases, you will use readymade solutions that work well on the other sites, but you can always try to rethink traditional models and simplify them. If you want to get a stunning result, it is very important to be able to change the already installed components of the website and work on their improvement.
10. Adjust the Size
Blocks and images inserted into the web pages are measured in pixels or percentages. If the website size is defined in percentages, then this is a responsive design. It is a very useful technology because it allows you to develop a mobile-friendly design that looks good both on smartphone and desktop screens. But if you lack the experience, use pixels instead.
If you choose to apply responsive design, then the first you should do is to decide which blocks will stretch when the browser window is resized and which will stay the same. Experts recommend starting with designing for small screens and then transferring to the large ones. Create several files for standard display resolutions (1280 X 1024, 1920 X 1280, and 1024 X 768). Use them to get a visual idea of how the site looks on different screen sizes.
11. Challenge Yourself
We encourage every designer to challenge themselves before starting each project. Being innovative is not a job requirement, but it’s worth making such a habit. Try to come up with something fresh, interactive, and design-related every time you get a new assignment. For instance, you can promise yourself to test a grid system that you see for the first time, create a new component for the interface, or challenge yourself a little and refuse to use blur tools or one particular color.
12. Organize Your PSD Files
It is one of the most important tips when working with Photoshop. It doesn’t matter how large your project is or how many designers are working on it – you should always keep your files organized. It will be much easier for you to export files, speed up the work, and exchange files with other designers.
13. Make Friends with Developers
Developers are creative people who love their job as much as you do. But, very often, they join the project after the work on website structure is completed. It is not always correct; sometimes, the best ideas come from the development team. Therefore, it’s good if you work on the project together from the very beginning. Exchange ideas, experiment, and the result will exceed all your expectations.
14. Be Critical to Your Ideas
There is a very thin line between understanding when to defend your idea and when to listen to the voice of the client and the advice of the team who do not agree that your proposal is the only correct one. You need to believe in what you are doing, but you also need to be able to quickly switch from one idea to another and come up with something completely new. Remember, there is always more than one solution.
Moreover, you should keep in mind that the work you do will not always look perfect for everyone. For example, a user might be viewing the page on a very small screen where it’s hard to see anything, and the site may appear to be inactive for one. But we highly recommend you to keep the best scenario in mind – target a broad audience, with good browsers and screens.
15. Keep Track of Your Design even During the Development Stage
If you work for an agency, you understand how difficult it can be to start a new project, knowing that the previous one is under development. Despite what many people think, work on a project does not end immediately after submitting the file.
If you care about your design, then check back from time to time to see how the process of development is going and be prepared to help the team if they need it. As a result, you will get a truly high-quality product to your portfolio.
All designers like to see not only the final website but also the process of creating it. Sometimes, the best projects are left unfinished because of the problems that the designer is unable to solve. After you complete the project, share the work process and analyze interesting cases. This way, you will make a valuable contribution to the development of the sphere: your experience will help other designers, and you will be given the chance to receive advice and comments.
Instead of Conclusion
The steps discussed in this article are the first you should take to become a designer. If you are interested in creating awesome products, there is a lot more to discover. But remember that everything is possible as long as you keep learning and practicing!


